The Cardboard Boat ProjectWhat are the goals of the project?
In this project, we are designing a cardboard boat that should be able to hold one person. However, in the prototype, the boat is designed to hold ten pounds. The project goals are to create a boat out of cardboard that can successfully float a person ideally for a very long time. The learning goals are to understand buoyancy, volume, and displacement of water. We are also learning how to use materials to make a boat out of cardboard and make the cardboard waterproof using different methods. In addition we are creating a bill of materials, in order to learn how to be engineers by figuring out what different materials cost and how much we are using. These are all things we are learning from this project but the main learning goal of the project is to understand and apply the engineering design process. 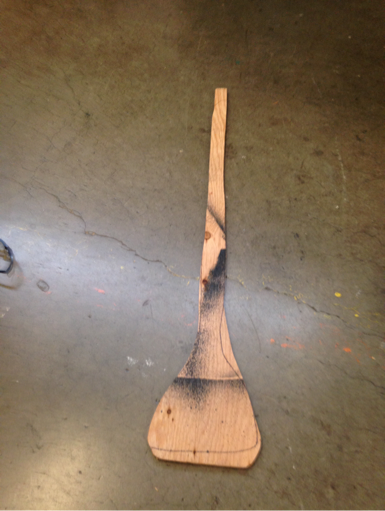
Our Oar
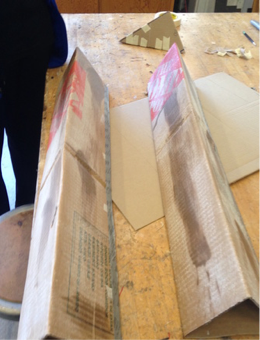
Sides after applying paraffin wax to the prototype
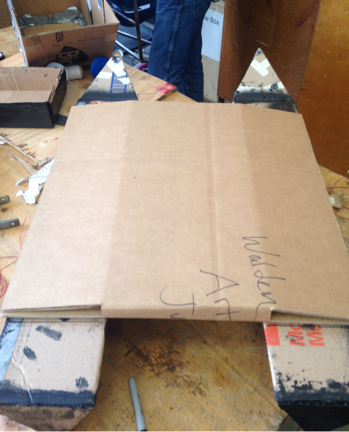
Completed Prototype
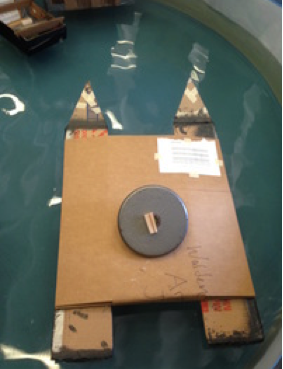
Prototype with weight
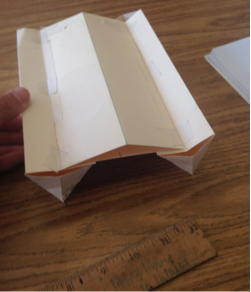
Foldable design
Upper left to right: Finished final boat, folded boat
Lower left to right: Skeleton of body, pontoons after flex seal 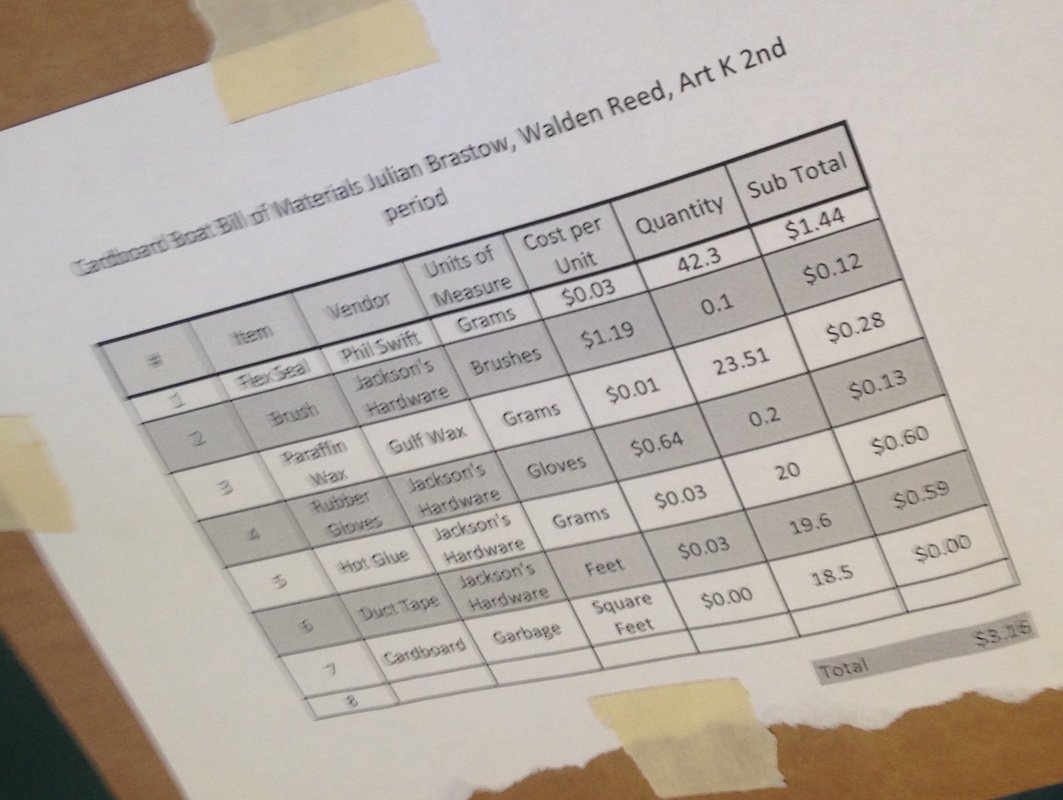
Prototype Bill of Materials
Cost
Now that I think about it, the price of different materials really didn't effect our decisions on anything. We tried not to over use duct tape or flex seal, but we just used as much as we needed and didn't really take into account how much it would cost. If we had been more conscious of how much materials we were using, we might have been able to reduce the cost of our boat. 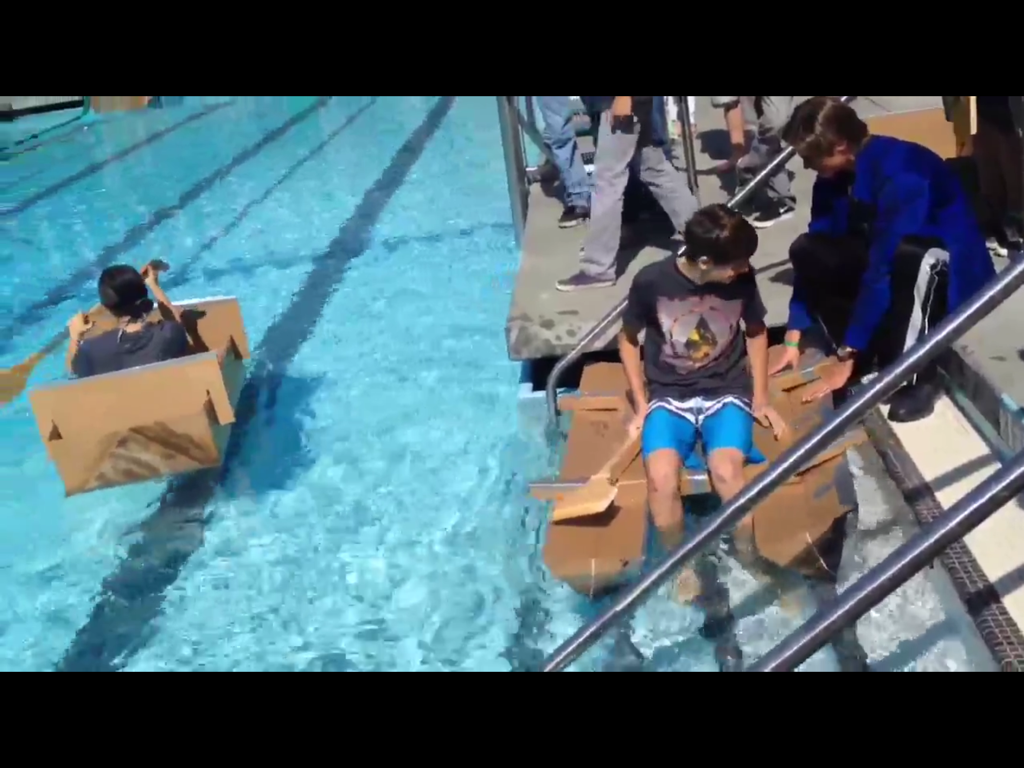
|
How did we actually do this?
The Engineering Design Process Step 1 Define the Problem: The problem defined by Green Rescue is to make a profit by mass producing and selling high quantities of low cost flotation devices to governments of tsunami threatened nations. Step 2 Identify quantifiable criteria and constraints: The quantifiable criteria and constraints defined by Green Rescue are as follows: Minimize the number of steps to produce each boat, maximize the minutes of flotation time for 150 lbs, minimize the cost per boat, and minimize the volume of each unassembled boat. Step 3 Brainstorm: During this step we used a large sheet of butcher paper to brainstorm and put down all of our ideas for the best boat. We came up with several ideas and we drew diagrams and wrote down measurements. Step 4 Research and generate ideas: For this step we went home and researched options for making cardboard waterproof, patching holes, etc. I was assigned to researching ways to make the cardboard waterproof, and I found three options. The first was to melt wax and apply to the cardboard, the second was to paint liquid rubber onto the cardboard, and the third option, the one I thought would work the best, was to spray Rustoleum NeverWet onto the cardboard. This was a substance that when applied to a surface, makes any water that comes in contact simply roll off. In other words, the water just does not stick or make the surface wet at all. Despite my find, though, the class ended up using melted paraffin wax and painting it onto the cardboard in order to waterproof it. To patch/seal holes and seams, we either used duct tape, Flex Seal, or hot glue. Step 5 Explore possibilities: This step involved more brainstorming, and we came up with four separate ideas for a boat. Our ideas were a floating box, a canoe, a three pontoon catamaran, and a normal catamaran. Step 6 Select an approach: In this step we created a decision matrix. A decision matrix is a mathematical way to decide the ranking of several ideas. We used the criteria and constraints defined by Green Rescue to figure out which boat would be the best fit. The normal catamaran ended up coming out on top. Step 7 Build a model or prototype: This step took a 1 to 1 1/2 weeks and involved the construction of our boat prototype. We used scrap cardboard to build. First, we drew out measurements and then cut out the two pontoons. We taped pieces of cardboard onto the ends of the cylinders so that they would be sealed, and then went to the waxing. In order to create our bill of materials, we had to know how much wax we used. So before painting any wax on, we weighed our pontoons down to the gram with a scale. Then we painted paraffin wax all over the bottom part of the pontoons. The next step was to ensure no water got into the edges by spraying on flex seal. One thing I learned while spraying the flex seal onto the cardboard was that it's a delicate process. It will be an important skill when using flex seal in the final boat. When we were done waterproofing the pontoons we worked on building the main body where the ten pound weight would sit. We hot glued this to the pontoons and it had supports on the inside. Step 8 Test and Evaluate: For step 8 we put our cardboard boat prototype in a kiddy pool with a ten pound weight sitting on it. Our boat performed well, and was able to hold the weight for over an hour before one of the pontoons started taking on water. One thing we needed to improve on was making the boat's callapsable size smaller. Our boat was one of the biggest in the class so we needed to make our final version able to collapse. We would figure out how to do this in step 9. Step 9 Refine the Design: This was a very important step because our boat performed very well holding weight and it was stable. However, we needed to come up with a design that would be able to fold down to a small collapsable size. So we made a design that allowed the pontoons to fold in on the body, and made supports that would ensure that the pontoons didn't fold in on themselves when it was in the water. Step 10 Create, Make, Build: This was the longest step of the design process because it involved the construction of our final boat. We worked very hard on this and it took about a week and a half. We took a lot of care with the measurements and then the waterproofing of the pontoons, and we also put a lot of thought into the construction of the body. Step 11 Evaluate and Communicate Results: This step was the most fun. We were able to go to the pool and launch our cardboard boats to see how they performed. I was pretty excited to get in the boat and see if it could float. So excited in fact, that I didn't think about how far off the steps to put it. So when I sat in the boat, there was only a couple inches of water between the bottom of the left pontoon and the step, so the boat sank down and my weight broke the supports when the pontoon hit the step. I was so full of energy that I didn't really think about what had just happened, and I simply moved the boat farther over and hopped in. This resulted in the left pontoon going under because it was bent, and because of this, the right soon followed. Factor of Safety
A zero deformation factor of safety is the absolute amount of weight your boat can hold without any deformation, divided by the amount of weight your boat is going to hold. To figure out our factor of safety we first calculated the volume of our pontoons (5 cubic feet) and then figured out how much water it would displace. 1 cubic foot displaces 62.4 pounds of water, so that multiplied by 5 is 312. So 312 is the absolute maximum amount of weight our boat can hold. Our boats were supposed to be designed to hold 150 lbs. So 312÷150=2.08. Therefore, our zero deformation factor of safety is 2.08. I weigh less than 150 pounds, so if we calculated the zero deformation factor of safety for me, it would be about 2.4. Anything over 2 is a good factor of safety so even though our pontoons were relatively thin, we believed our boat would fair well 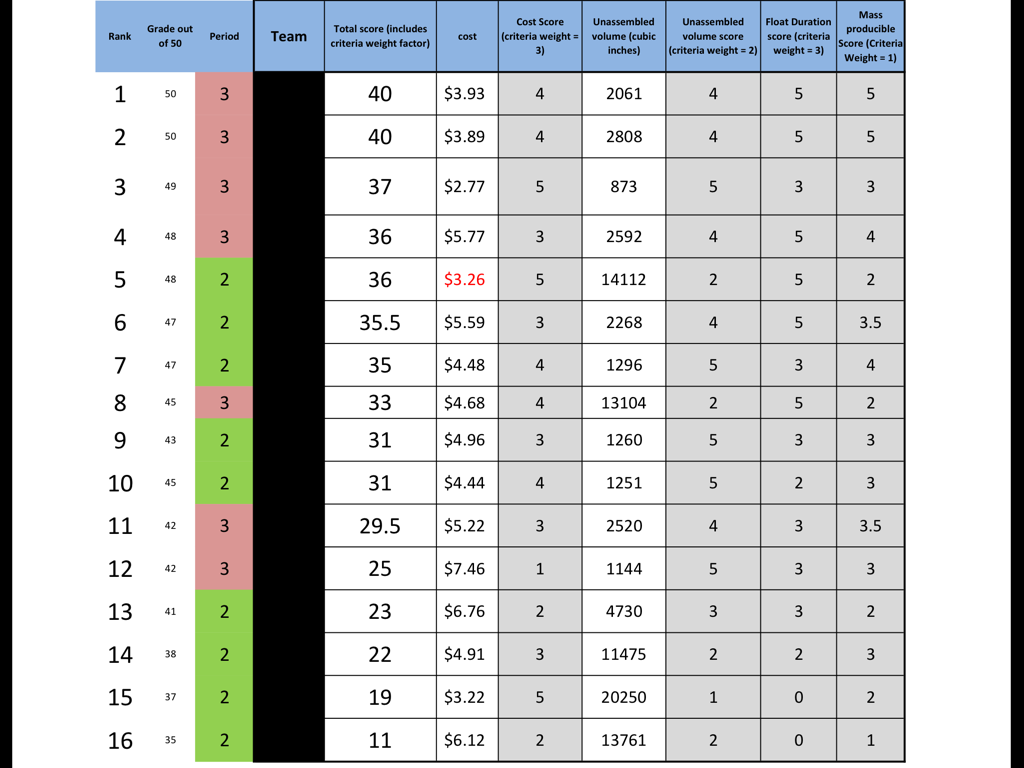
How did it turn out?
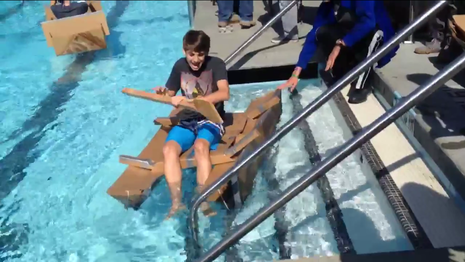
Our project did not meet the project goal because when I tried to sit on the boat, the supports broke at one end when the bottom of the boat touched the step. If this had not happened, I believe our boat could have made it to the other side of the pool. Our factor of safety was also a little low but I still think we could have made it. The data table above shows the 2nd period and 3rd period class wide results. We are at the very bottom. As you can see by the video above and the picture to the left, the cross supports and the pontoon on the right side of the boat are bent under the weight of myself on the stairs. |

Conclusions
I definitely learned everything I stated in the goals of this project. From buoyancy to waterproofing cardboard to even little tips for Microsoft Excel. But the main learning goal of this project was to learn and apply the Engineering Design Process, and there's no doubt that I learned every step of this process. It was very clear what we were supposed to do for each step, and I learned that the engineering design process is a continuous process that can loop forever. It doesn't just have to happen one time. If I started over from the beginning of this project, I would definitely build a completely different boat. I noticed that the boat designs that worked the best were the simplest. I would make a boat that is just a plain box with maybe a couple of support bars. Those were the types of boats that performed the best. If I were the teacher, the only thing that I would maybe do a bit differently would be to not grade the students so heavily on the performance of their boat, and rather what they learned during the project. I learned so many new things about the engineering design process, laws of buoyancy, etc., that it would work if we just had a test that assessed our knowledge on those things. But overall, it was cool how we were able to build something so significant that came from our own brains and not from a sheet of directions. I liked building this boat because I really had a sense of accomplishment when we were finished, even though it didn't work out in the end. I learned a lot from this project and it will definitely benefit me in my future years to come.
I definitely learned everything I stated in the goals of this project. From buoyancy to waterproofing cardboard to even little tips for Microsoft Excel. But the main learning goal of this project was to learn and apply the Engineering Design Process, and there's no doubt that I learned every step of this process. It was very clear what we were supposed to do for each step, and I learned that the engineering design process is a continuous process that can loop forever. It doesn't just have to happen one time. If I started over from the beginning of this project, I would definitely build a completely different boat. I noticed that the boat designs that worked the best were the simplest. I would make a boat that is just a plain box with maybe a couple of support bars. Those were the types of boats that performed the best. If I were the teacher, the only thing that I would maybe do a bit differently would be to not grade the students so heavily on the performance of their boat, and rather what they learned during the project. I learned so many new things about the engineering design process, laws of buoyancy, etc., that it would work if we just had a test that assessed our knowledge on those things. But overall, it was cool how we were able to build something so significant that came from our own brains and not from a sheet of directions. I liked building this boat because I really had a sense of accomplishment when we were finished, even though it didn't work out in the end. I learned a lot from this project and it will definitely benefit me in my future years to come.
